Thursday, May 31, 2012

Icing on the Tutu

Finishing the tutu: tacking and decorations

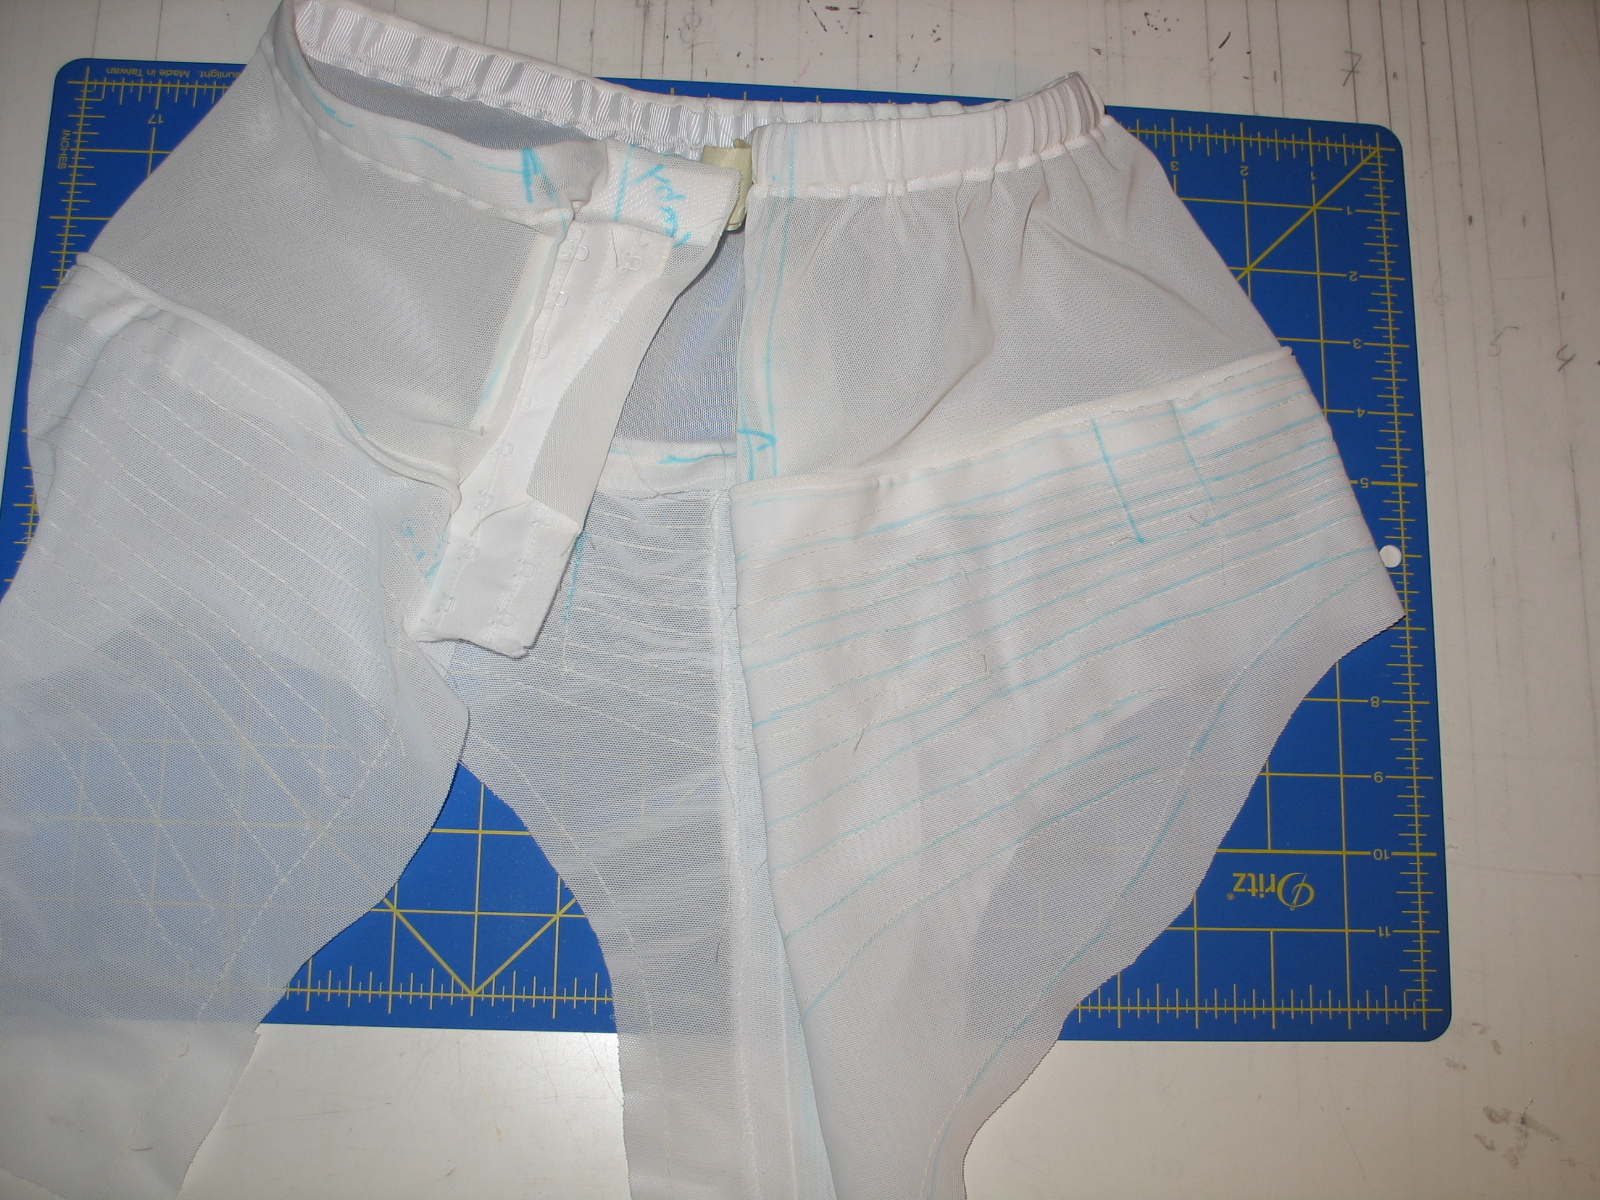
Performance tutu with one round of hand tacks
After sewing the tutu up, and giving it a good steam there is still a lot of work to be done before it is stage ready. 
All tutus, even practice tutus, should be tacked. Tacking means that the layers of tutu net are sewn together. This ensure that the tutu looks even, moves well on stage and doesn't sag. 
When tacking a tutu, two to three layers of ruffles are sewn together with some sort of tack, top to bottom. Tacks are placed around the tutu,  every inch or so. Once groups of layers are tacked together (say 1-3, 4,-6 and 7-9), the tacked layers are tacked together. Tacking a tutu well is an art. When done well, the tutu looks and moves evenly.

If a tutu will be partnered the tutu needs to be hand tacked. This means that hundreds of thread loops (or swing tacks) are sewn through the layers of tutu net. Each tack has to be sewn by hand and then tied off. This is fiddly and time consuming. When I first started doing this, it would take me days (about 2 hours per layer) but I can now hand tack a tutu well in about 4 working hours.


Gun tacking a tutu using a price tagger

 A much quicker alternative is to gun tack a tutu using a price tagger and plastic tacks. The down side of that type of tacking is that the tacks will rip a hole in the tutu before breaking. That is why this type of tacking is unsuitable for partnered tutus. You want the tack to break rather than rip a hole in the tutu! Replacing a tack is easy, replacing whole layers of netting is not.
Gun-tacking works well for corps de ballet tutus because it is relatively fast and inexpensive. With practice, a tutu can be gun tacked in under an hour. If you have lots of tutus to make, that is the way to go.
The only other thing you have to be careful of is the gun tagger's very sharp needle. I cannot tell you how many times (and how painful + messy) I  tacked my thumbs or fingers to a tutu when I first started. Bleeding all over a tutu is not pretty.
If you have a small blood stain, good old spit, is a quick fix. A cold water soak, Oxiclean  (tm) or other enzymatic stain remover are a longer term method of removing blood stains.

Once the tutu is tacked, it is a good idea to steam the tutu one more time. If the tutu seems to be flipping up too much, hanging the tutu right side up, giving it a good steam and then leaving it to hang overnight will usually solve this problem. 
Dancer's sometimes complain about a "duck" or "turkey" butt on their tutu (i.e. that it lifts up at the back). Usually this is because they have been sitting in the tutu or leaning the back of the tutu up against something. The easiest way to prevent this unflattering look is to steam the tutu well and to not "hang-out" in the tutu before going on stage. In extreme cases, I have tied a big ribbon around the tutu, causing all the layers to slope down, and then steamed it. If the tutu is correctly made, this is unnecessary and you actually do not want to do this. Over time, gravity will work on the tutu, along with sweat, body heat, dirt etc. and the tutu will become less "perky".


At this point in the tutu building process, you will have a functional tutu skirt. Depending on the style (Russian, English, French etc.) a bodice can be added or attached, along with decorations.
A sugar plum tutu comes together

To make the tutu more useful, decorations should be added to a so-called plate: a large circle of netting or fabric, which is tacked onto the top of the tutu. Plates can be removed so that the tutu can be more easily washed or cleaned and by alternating plates, a tutu can be used for many different roles.
Sugar plum tutu with a very simple plate added
Plates can have scalloped, pointed or other shaped edges. They can be very simple or very ornate. In some more contemporary tutus, plates can be shaped like playing cards, maps, chess pieces etc.
This is how a tutu is built. Check back for posts on specific tutus: Nutcracker, Sleeping Beauty, Swan lake and Romantic tutus from Giselle; tutu care, bodices, head pieces and other goodies


Wednesday, May 30, 2012

Sewing it together


4) Sewing it together:

-->
After ruffling the netting can be steamed to set the pleats and then the ruffles are sewn to the pants.
Using steam to smooth out tutu ruffles

Depending on the dancer's and choreographer's preference tiny tulle "panty" ruffles can be added to the front of the pants. Panty ruffles are preferable if the tutu is partnered because when the dancer if lifted in the air, the underside of the tutu is visible and you want everything to be covered.
It is important not to make the panty ruffles too long and have them run too far towards the crotch, as this looks very strange (furry or fluffy), can be itchy and if the tutu is white, makes the dancer look as if she is wearing a frilly diaper. It is very hard to cut 0.25-0.5" panty ruffles evenly, so what I do is cut 1" ruffles, sewn them on and then trim them down.
Ruffles can also be placed around the leg openings. Most dancers hate this because if not done perfectly, leg ruffles are intensely itchy and can make the dancers legs look heavy. I would not add them unless asked to do so.
Tutu's worn for performances also have several rows of small ruffles at the back of the pants, called "butt" ruffles. Again it is important not to make these too long as it can make the tutu ride up in the back. Tutus used during rehearsals, called practice tutus, do not have these ruffles.
Tutu ruffles can be sewn on either from the top down or from the bottom up. After making almost 100 tutus, I use a mixture of these two methods. I start sewing the ruffles from the bottom up to about ruffle layer 5 or 6, then I sew the top ruffle pieces on and then fill in the remaining ruffles.
The reason I do this is to make sure that the top ruffle is level. It is also much easier to sewn this ruffle on when I have a bit more room and do not have so much netting to wrestle with. All 9-10 layers of ruffles need to fit into a space of between 2-4 inches (this depends on the size of the tutu and where you are on the tutu; there is less room over the hip for instance than in the front or back).

Adding layer 5, only 4 more to go!

Tutu after steaming, all ready for tacking
 Once all the ruffles are sewn on, the back seam and crotch seams of the pants are sewn up, the leg elastics sewn down and the crotch seam tacked. The final step is to steam and tack the tutu.  Tacking means that the layers of tutu net are sewn together. This ensure that the tutu looks even, moves well on stage and doesn't sag. Tutus often have a metal hoop inserted into a casing, around layer 4. This is a must for the Russian style tutus and is done to add strength and create that very thin, flat look. Until now I have only made the softer, more feminine English style tutus, without hoops. A hooped tutu is much stronger and if you are adding a lot of heavy decorations you need a hoop.
I went to Tutu.com's summer school last year and took a break-out class to learn how to add a hoop into a tutu. I highly recommend anyone thinking about making real tutus to invest in a tutu seminar either from Tutu.com or Tutusthatdance. Just look them up. Even though I could be considered a "seasoned" tutu maker, the experience and all the time (and frustration saving) tips I learned were worth every penny.

Tuesday, May 29, 2012

SharpScience

I have moved everything to do with home schooling and SharpScience to a new blog: SharpScience
because I felt that had a very different audience. To read about home schooling and SharpScience, please look there.
thanks!

Ruffling

Tutu-torial 3:

-->

Ruffling

After cutting multiple layers and widths of tutu net, the net is ruffled or pleated. There are a number of ways of doing this:
1) Using a ruffler attachment on a sewing machine
2) Using a specialized ruffler such as a pleater or Johnson ruffler
3) By hand: double, triple or more 

three types of pleating: double hand pleating, smocking pleated, machine ruffled

A good quality ruffler can cost up to $95.00 but if you are making a lot of tutus it is worth the cost. Make sure that you purchase your brand of machines' ruffler, not a cheap generic. It may all seem to work well in the beginning but the generic rufflers do not have the correct clearance for the feed dogs and can damage them, leading to a very costly repair.  You may think you are "saving" money but trust me on this, you are not!! (Ask me how I know this? I purchased and used a $25.00 generic ruffler which damaged the feed dogs on my machine so badly, broke off teeth, that they had to be replaced to the tune of almost $200, plus I could not use my machine for 8 weeks while it was in the shop, so I was unable to do any work during that time.)
If you were to go into business, one thing to consider is a machine called the Johnson ruffler.
All this machine does is ruffle.
I own a Sally Stanley smocking pleater and for pleating tulle, chiffon, organza etc. it is wonderful if a little slow and time consuming. A smocking pleater is a magical device that has three roller barrels, with multiple channels in it where specialized needles are place. Each needle has to be individually threaded, then the fabric is fed into the pleater and the pleater barrels are moved by cranking a little lever. The fabric slowly rolls through the barrels and comes out with tiny, parrallel pleats.
 
Hand pleating is the only way to create the beautiful, even, professional look of a tutu. I learned how to do this by reading the directions in The Classical Tutu book by Claudia Folts and by watching a Youtube video put out by Tutu.com
 Real tutu net pleats very well, tulle is another story. Good quality tulle, made here in the US, is very soft and so it is hard to get it to hold a pleat. I have found though that if you sew or serge 2-3 pieces on top of each other, the tulle has enough body to pleat well. Another advantage of that is that by using multiple layers of tulle, you can create wonderful, vibrant colors and shading.


Monday, May 28, 2012

Tutu ruffles


2) Tutu ruffles

After making the pants, the layers of tutu net (or tulle) need to be cut. Tutu ruffles are cut in sections, which are overlapped when sewn onto the pants so that they look as if they are one piece. There are two reasons for that:
1) net and tulle are hard to work with; they are scratchy and tend to become statically charged. It is easier to cut the fabric as strips rather than one long piece and this also allows you to get even pleats and an even looking tutu.
Cutting tutu net.

2) To "dag" (cut the tutu's edge into shapes such as points or scallops), each piece is folded to a 1" strip and than cut once.

Dagging layers of tutu net


Tutu ruffles are not sewn together to form one piece. Something very important when overlapping the tutu ruffles is avoiding what I call "the gap" and the worst of all is the crotch gap. Nothing looks worse then when the ruffle overlap is placed in the same place on the tutu causing vertical lines. European tutus have a slight slope to them, with a modest dip in the front. This is achieved by alternating the direction of the ruffles seam allowance (one row has the seam allowance or raw edge facing up, the next row will have the seam allowance/raw edge facing down) not by misplacing the ruffle overlap.
The top row should always be sewn with the seam allowance facing down so that the ruffle falls down, creating a smooth finished look. If cording has been added to the bottom edge of the basque, the top row needs to fall smoothly below this cording.

The start of a classical tutu

How to make a professional tutu:


The start of a classical tutu:

Before anyone starts on the journey of making classical tutus,  I think it is important to stress that while it can be a lot of fun, it is neither "quick" nor "easy". Tutu makers do not talk about sewing a tutu but building one, as it is closer to an enginering project than a fashion statement.
A wonderful book, that explains how to make a classical (please,  calling them pancake or worse platter tutus is just incorrect, they are not food or a serving device) tutu is Claudia Folts' book the Classical tutu (available from Tutu.com). Tutus that Dance also sells instructions on how to build a tutu.
An average classical tutu uses about 10 yards of tutu net (also called diamond hole net, Balanchine net or crinoline; this is not craft net or "stiffened" tulle) but can also be made out of tulle or a mixture of netting and tulle. 
From start to finish creating the tutu skirt will take a novice a minimum of eight or more working hours; for a complete costume (skirt and bodice) even an accomplished tutu maker takes between 20-25 working hours, depending on the complexity of the bodice and the amount of embellishments and if the tutu is hand or gun tacked.
o
silver brocade basque and cotton tutu pants


Powernet tutu pants and basque


Tutus are built on a pair of panties or knickers, which are later sewn to a basque (a piece of fabric, waist to hip, which can be the same as the bodice or different). The pants are made of a stretchy fabric called powernet or can be made out of cotton bobbin net. Powernet is strong, washable and not too expensive. Cotton bobbin net is fairly strong, comfortable but is expensive ($30.00 + per yard) and has to be pre-shrunk because it can shrink up to 30%.
I have always used power net because the tutus I make have to be worn by many different dancers and so have to stand being altered often. I also make a gross grain waist band with elastic, so that the tutu is adjustable at the waist.
Both power net and bobbin net only come in white, nude/off-white and black but can easily be dyed to a color to match the tutu ruffles.
Tutus, especially those that will be used for partnering, need to fit well. Having a tutu that is too big can present a serious safety risk during partnering, because the partner cannot get a firm grip on the dancer. Some fabrics, such as satin, or some types of brocade are not suitable for tutu basques because the fabric is too slippery,  has too rough a texture or stretches too much.
To ensure that the ruffles are sewn on evenly, lines are drawn onto the pants with a washable marker or tailor’s chalk and then the lines are stitched with a lightly contrasting thread. I use an egg shell colored thread for white tutus and a dark charcoal grey for black.

Swan Lake's Queen Mother


 A Titian inspired Queen's gown:

I decided to make the queen mother's gown more as a whim than anything else. I love reading other costumers blog's and one that I discovered recently is Jennifer Thompson's blog:  Festive Attyre. I was especially inspired by her Italian Renaissance gowns and the corded corsets intrigued me.
It looked like so much fun making something like this and "How hard could it be"? I did not want to spend any money making a sample gown, which I did not think anyone would wear, so I asked around and was given several old prom dresses. At the thrift store I bought a 100% linen, plus sized dress and one ball of hemp twine for the corset and set to work.
The first thing I needed to make for an authentic looking  Italian Renaissance style dress was a chemise or camica. I had a few yards of cotton lawn in my fabric stash and although a camica is usually made of handkerchief weight linen I decide to use it. I followed the directions on the Festive Attyre websites to make what basically was a three rectangles sewed together  with gussets under the arm. The sleeves are about two to three times as long as the arm length so that they can be pulled up in and over the sleeves to create big poofs.
 I finished the top edge of the shirt and the bottom of the sleeves with some smocking and gold and pearl glass beads.

Italian style chemise: camica


smocked top edge of camica


front of linen corded corset

side back lacing on corded corset
Following Jennifer's descriptions I also made a corded corset out of the 100% linen dress I bought at the thrift store with four 1/16th inch hemp cords pulled into each channel.
After having worked with Rigeline boning and spiral steel, making a corded corset with hemp twine was awesome and easy. I machine sewed the channels, top to bottom on the linen, then using a loop turner I pulled the hemp cording through the channels. Then I sewed across the top and bottom to seal the channels, trimmed off the excess cording and finally covered the edges with bias strips of linen.
I used side, back, spiral lacing. I sewed two strips of heavy duty twill tape, with two parallel lines of tape for threading the ribbon. The details are all as Jennifer described in her blog.
For the dress I used two periwinkle satin prom dresses and some pale green and gold brocade which my mother had given me.  The brocade was left over from some Christmas decorations but had become water damaged in a flood in my parents' basement. By turning the brocade, the water stains were covered up and it looked better. I also turned the satin so it was less shiny and used two strips of  a flocked satin to outline the front of the skirt. At the back, I cartridge pleated the skirt to the bodice.
Finally the sleeves were made of some upholstery fabric, again from my mother's stash. I made them a little darker by spray painting them with Design Master, floral spray paint and lined them with fabric from one of the prom dresses. I sewed some metal rings to the top of the sleeves so that they could tie onto the bodice and by pulling the sleeves up create some nice poofs.
The dress turned out really well I think, especially since it cost me all of $5.00.  I am thinking of making others to order using quality materials, now that I have worked out a pattern  and basic design.
queen mother's Titian inspired dress.
I also took a headpiece which I had originally made for Cinderella Fairy Autumn but was not used and redecorated it for the queen. This is what the dress looked like on stage:
Queen mother and Siegfried, Ryan Camou ( Swan lake)

Sunday, May 27, 2012

Current projects: A rainbow of skirts


A rainbow of skirts and two chiffon dresses:

A few weeks ago I started on a new project, making some costumes for a dance recital for a Christian dance school. After meeting with the teacher,  talking about the themes of the recital and drawing sketches, I set to work.
Six colorful skirts and gold sashes
The little girls dance was about the nations of the World worshiping God. To represent that, we came up with the idea of colorful circle skirts, gold sashes (as each girl was to represent a nation or part of the World) and themed hair pieces.
Two teenaged girls were dancing a piece called the Beauty of ballet.  The teacher and I decided that flowing, chiffon dresses in pastels with circlets of flowers would be appropriate.
Dress design and beginnings of flower circlets
At first I was going to use a commercial pattern to make the chiffon dresses but the pattern was designed for a child, rather than a young teen. I therefore drew a new pattern, changing the bodice and making the skirt attach differently to the bodice. The bodice now is ruched both in the front and back, has a V-shaped insert and a sweet heart neckline. The dresses also have two full circle skirts, and small ruffled sleeves.
The head pieces will have pastel colored silk flowers, some dyed to match the dress colors and a little sparkle.
The is a much smaller scale project but it has been challenging and fun because I am designing for small children and teenagers.
The little skirts and sashes are done. I'll add more photos as the chiffon dresses and flower circlets come along.

Saturday, May 26, 2012

22 Swans a dancing

Ithaca ballet Swan lake

Not just swanning around here: creating 22 Swans

As I wrote in a previous post, this year I ended up creating  22 swan tutus for Swan lake, plus two stunning bodices and headpiece for Odette and Odile. On a whim I also made the queen mother a new Titian inspired dress and re-purposed the crown I had originally made for Cinderella fairy Autumn  for Siegfried's mother.

Before starting Cinderella I had purchased 4 bolts of white tutu net, a bolt of ivory net and we had a bolt of bridal illusion in wardrobe. The initial plan was for 16 corps de ballet swans and one swan queen but by November the numbers had grown to 18 corps de ballet, a swan queen and a black swan and after Christmas it was finally decided that 20 corps swan tutus were needed, plus two tutus for the principle dancer, plus new headpieces and bodices.
Way back in the summer I had made a start at cutting and dagging (cutting into points) layers of white tutu net. As time went by I had more and more bags of tutu net and thousands of little net triangles all over my sewing room and house.
There is nothing more sticky or itchy than tulle and tutu net. Imagine finding scraps stuck to clothing, the carpet, the furniture and even the cat. Once in a while, I or a family member would be driving crazy by intense itching. At first we thought it was some scary dermatological condition but no: it was a triangle of tutu net.
By the time I was ready to start sewing the tutus, I had cut and dagged 1100 pieces of tutu net. Let me spell that out eleven hundred pieces or 220 yards of tutu net. No matter how you spell it that is a lot  of tutu net.
Once pleated up, it took up two large plastic boxes. All 9 layers of each corps de ballet tutu was cut into points to simulate the feathers. The top layers were triple hand-pleated ivory and white bridal illusion tulle to give the tutus a  little depth and so that they had a soft look because apart from that they were to be without any ornamentation.
Once sewn up I was able to stack the tutus floor to ceiling before steaming and tacking, then the stack shrunk considerably.
Twelve white swan tutus before steaming and tacking

four white swan tutus after steaming and tacking


I managed to finish the tutus well in time and so was able to take them to the studio for the dancers to rehearse in. If you have never worn a properly made, classical tutu it can be very tricky at first. Each tutu is 12 inches in diameter, which creates a little space around each dancer. The dancers need to learn how to space themselves so as not to bump into the next girl. The dancer also cannot see her own feet and so has to be very careful what she does.
22 Swan lake tutus waiting for rehearsal at Ithaca ballet
Getting in and out of a tutu can also be tricky, you need some help getting the hooks done up. The girls came up with a very clever way of getting into their tutus quickly.
Ithaca ballet dancers getting ready for Swan lake rehearsal
I made two new patterns and designs for Odette and Odile's bodices. I designed the Odette bodice as a long line bodice, with a deep, pointed neckline and a low back.
Odette bodice in an off-white bengaline with a hand beaded overlay

The Odile bodice, would have a point front and back, sit below the waist, have a low cut neckline and a low back. Both bodices had hand beaded lace appliques for decorations. I am offering them for sale in my Etsy shop.
Back of Odile bodice


Odile bodice, corps tutu
Black velvet Odile bodice, with hand beaded lace applique
 I also made two simple wing shaped plates, according to Claudia Folts instructions in her book Finishing Touches.  I used white and ivory satin, silk and charmeuse "feathers" appliqued with silver thread to a white sparkle tulle plate for Odette. For Odile, I made black velvet, turned black silver satin and black silver mesh feathers, which I appliqued onto a black mesh wing shape with silver thread. Leila Drake of State Street Ballet graciously offered to model the costumes for me.


Leila Drake as Odette
Ithaca ballet Swan lake

Leila Drake of State Street Ballet as Odette


Leila Drake as Odile
Ithaca ballet Swan lake


 Only the tutu and headpiece were to be used for Ithaca Ballet's performance of Swan lake, so I did not sew the bodice and tutu together. One of the things I still find very difficult is getting photographs that do the costumes justice. Finally I made headpieces for Odette and Odile. The description of how these were made is posted under, topping it off.


To see Swan lake on stage click on the link.

Friday, May 25, 2012

Cinderella and the swans: the 2011-2012 season


Cinderella and the Swans: the 2011-2012 season

It has been a busy year for me with regards to SharpSewing-NY.  I had opened my shop on Etsy, SharpSewing http://www.etsy.com/people/SharpSewing and finally had enough items to actually list something and I was designing and creating costumes for a number of ballets.

June and July:

Throughout the summer I had meetings with the artistic director and wardrobe manager, drew sketches, made mock-ups, drafted patterns, searched for fabrics, e-mailed back and forth, placed orders and bought fabric. There is a sort of magic preparing for a new season, with lots of ideas going back and forth. Good costuming is a combined effort with everyone offering up their ideas, and sharing their opinions.

Designs for Cinderella Fairies
Around August, after the artistic director had picked designs, and I had made the first drapes and mock-ups of the bodices and Fairy Godmother attendants tutus I set to work in earnest cutting out tulle, tutu net and pants.
The plan for the season was exciting: 3 totally new costumes for three seasons fairies for Cinderella, updating of the 8 Fairy Godmother's attendants costumes and white swans for Swanlake.
During the previous season I had made many new tutus: 8 Nutcracker Waltz of the Flowers, a Dewdrop fairy,  a Sugar plum, a Sleeping Beauty Lilac Fairy, 6 lilac attendants, Aurora act 1,  an Aurora wedding tutu, 12 Vision scene Romantic length tutus, a Gold, Silver and Diamond tutu. I had also refurbished the Fairy Golden Vine tutu, the Bluebird tutu and bodice, Red Riding hood tutu and the Sapphire tutu. (I'll write about all of that in another post). Scott Dolphin had made the shows' design and he had designed and created the bodices, plates and overlays. This season I was in charge of the designs, purchasing and creating of the new costumes.

August and September:

draping Cinderella fairy bodice

side view of Cinderella fairy bodice
back of Cinderella fairy bodice
 The new design for the Cinderella fairies called for longer bodices with a more cut out back and nude tops to be worn under the bodices. The tops were to be decorated with vines, leaves, flowers and icicles depending on the season. The old costumes had very plain bodices which were short and tended to ride up and netting arm puffs which the dancers found extremely itchy and uncomfortable.
After more than 30 years, the old costumes were worn and the colors were no longer vibrant. Even fabric colors follow a fashion and so the original olive greens, golden rod yellow and rust browns were no longer available. Instead fresh, vibrant greens, yellows and autumnal red were chosen. The Fairy Winter was to receive a complete face-lift with a new blue tutu and navy blue, sparkly velvet bodice instead of the original black and gold. For the fairy Summer it was decided to use one of the tutus I had made for the previous seasons' Sleeping beauty, and create a plate, overlay and new headpiece so that she would match the other costumes. I would also be making updated versions of the old Fairy headpieces. At first we discussed refurbishing them but they were so fragile, it was better to use them as inspiration for new headpieces.
pattern for Cinderella fairy bodice

beginning of the Fairy Autumn decorations mock-up
Before any of the dancers had auditioned for the company, I made a start on the tutus, cutting the tulle,  and netting. Fairy Winter was to be graded shades of blue: navy, deep sapphire blue, lighter royal blue and silver sparkle tulle to give the tutu an icy glittering look.
Fairy Spring was to be a mixture of fresh, vibrant greens: emerald, leaf green etc. Fairy Autumn would be shades of red, maroon, brown, gold, and orange just like the many leaves seen at that time of year.
To give tulle enough body for pleating I always sew several pieces together. Each tutu was to have the top 5 layers double hand pleated to given them a very even look. I sort the layers for each tutu into bags and baskets so that I can quickly pleat and then sew them. I cut and double hand pleated or machine pleated layers of white tutu net for each tutu, along with white power net panties and double hand pleated or machine the layers of tulle.

tulle for Cinderella fairies Winter, Spring & Autumn tutus
tulle layers for a Waltz, Fairy Spring, Autumn and Winter

 Next I hand dyed the white tutu net and powernet to the desired color, (I will write a special post all about dyeing fabrics, later) washed it, dried and then it was ready to be sewn into tutus.
hand dyed layers of tutu net
Autumn, Winter and Spring tutus ready for steaming and tacking
sewing on the final layer of the Spring tutu
I started making the tutus and bodices as soon as the new company dancers were announced. All the company dancers were measured and than fitting for specific costumes could be done.
Once the tutus were sewn I made the bodices and tops. The Spring bodice was made of a yellow cotton fabric with a layer of golden yellow organza over top to give the fabric some life and depth. The Winter bodice was made of a dark navy, stretch velvet with blue sparkles. The  Autumn bodice was made of  a pinwheel corduroy. Corduroy is an easier fabric to work with than velvet but on stage it looks like velvet.
 The eight Fairy Godmother's attendants were to wear bodices from the Sleeping beauty ballet's vision scene and I was to create Williamsburg blue Romantic length over-skirts to be worn over the Nutcracker snow tutus. To give them a distinct look, each tutu was to have a beaded plate.

Decorating:

 Finally it was time for the "fun" part of costuming: adding the decorations and making the headpieces. Decorations for stage costumes need to be striking, sparkly and stand-out otherwise the are pointless. To make it easy to wash, alter and repair costumes, it is a good idea to make so called "plates" (decorated top layer for a tutu) and overlays (decorated layer for a bodice)
Autumn, Winter  and Spring bodices

Cinderella  Fairy Autumn
  Autumn's decorations and head piece were autumn leaves in autumnal colors: reds, browns, yellow and oranges.  The top had brown ribbon appliqued onto the sleeves to simulate branches and fabric autumn leaves. The plate was a circle of red organza, with a swirl of sparkles and appliqued fabric leaves in autumn colors. The leaf appliques started on the bodice and then swirled around the tutu. Finally, Swarovski hot fix crystals in autumnal colors were applied to the bodice and tutu.


To decorate Winter, icicles were added to the top and snowflake appliques were added to a plate.
 Winter's appliques were created by drawing snowflake designs onto a white mesh fabric with a small sparkly snowflakes design and then cutting them out by hand. The plate was created by appliqueing six snowflakes onto a circle of navy blue and silver sparkle tulle.The bodice overlay was a silver mylar lace applique, enhanced with hand sewn crystal drops and Swarovski hot fix crystals in blues, and crystal AB.

Creating Winter's snowflake appliques


Fairy Winter as it appeared on stage


To decorate Spring, a simple green lace plate was made and spring flowers (daffodils, dogwood and apple blossoms) were appliqued onto a bodice overlay. The bodice had a matching petal shaped peplum, so that the whole costume looked like an inverted Daffodil. The flowers  on the bodice and top were decorated with Swarovski hot-fix crystals in complementary shades.


Cinderella Fairy Spring


 Finally to decorate Summer, roses, sweet peas and other summer flowers in pinks, yellows and soft mauves were chosen. Summer's plate was created by hand dying silk flowers, than sewing eight bunches onto a peach sparkle mesh plate. The plates edges were cut as scallops. An overlay of the same peach mesh, with a white sparkle lace braid and matching summer flowers was used to decorate and old Raymonda/Lilac attendant bodice.
Cinderella Fairy Summer


For the eight Fairy Godmother's attendants, I created pointed shaped, beaded applique plates. First I applied Wonderunder to a beaded silk fabric. Then I cut out individual designs, sorted, arranged and glued them onto a white and silver support fabric. A quick iron finished the process. Gross grain ribbon was sewn along the top, so that the plates could easily be attached and detached from the tutus. 
Appliques for the Fairy Godmother's 8 attendants


One of the eight Fairy Godmother's attendant's costume

The Headpieces: 

Three of the headpieces were made of wire circlets, wrapped with gold or silver effect braid and then crystal leaves, hand made silk and organza flowers or crystals were wired to the frames. Leaves and flowers were further decorated with hot-fix Swarovski crystals.
Autumn headpiece
Summer  headpiece
Winter headpiece

The only exception was Spring's  headpiece. It was made of heavy duty horsehair braid and rigilene plastic boning, which was then covered with leaves and spring flowers such as daffodils, dogwood and apple blossoms. The leaves and flowers were then embellished with hand beading and Swarovski hot-fix crystals.
Spring headpiece

 October:

Full cast of Cinderella
Finally it was show time and everything came together on stage. The dancers looked beautiful in their new costumes. I had also refurbished the fairy Godmother's tutu by adding a new top layers of Periwinkle glimmer and sparkle tulle, new trim adn hot-fix Swarovski crystals on the bodice and making her new wings. The Cinderella tutu was the first tutu I had ever made. It had sat in storage for a few years waiting for its' moment. I had originally created it for Nutcracker's Dewdrop fairy, with a silver brocade bodice and beaded, embroidered organza plate but it had not been used.

After Cinderella, it was time to begin work for Nutcracker and Swan lake, but that will be for another post.