Monday, December 17, 2012

Spanish skirts and practice tutus


Several weeks ago, I blogged about the Spanish skirts and the practice tutus I had been making. Thanks to Stephanie Harris of Harris photographyhttps://www.facebook.com/pages/Harris-Photgraphy/366353280120806?ref=ts&fref=ts and Annelise, Catherine, Bridget and Gabrielle, soloists and senior dancers at the Ithaca Ballet for participating in my first photo shoot.
The costumes highlighted each individual dancers unique beauty and style (and I ran out of adjectives to describe them; I mean how many ways can you state the obvious that these girls look magnificent?!)
Bridget and Catherine look gorgeous in these Spanish skirts

 Bridget looks regal and beautiful in this four tiered Spanish skirt in black and

Soloist Catherine embodies a Spanish princess in this Spanish skirt with matching mantilla and rose headpiece


Annelise personifies the icy beauty of the Snow Queen.
This costume includes a stunning Russian style headpiece


Practice tutus are available for sale at my Etsy site or via SharpSewingNY facebook page.

These tutus are perfect for class: 

Practice tutus in pink, white and black
Perfect for class 


Rehearsal: 

Catherine soars in her practice tutu, customized with a double hand-pleated top layer.

Or Performance:

Catherine, Bridget and Annelise take a bow
Catherine, Bridget and Annelise


Soloists Catherine (at left) and Annelise (at right) model their practice tutus
Catherine's tutu has a double hand-pleated top layer and Annelelise's tutu is custom sized.

The dancer's also modeled some of the custom made items that I offer:
Annelise models a custom made Sugar plum performance tutu

Side of the bun: fun little headpieces

During the last few weeks I have been trying my hand at making head pieces, that sit at the side of the bun.
Hand made organza rose with hot fix Swarovski crystals
The complete set of instructions on how to make these can be found in Claudia Folts book: Finishing Touches.  The flowers can be made of silk, organza or other polyester fabric. Individual petals are cut and then sewn or glued together and mounted on hair pins,  a decorated shape of lace, fabric and/or netting. Depending on the costume style crystals, lace, beads, sequins and trims can be added to embellish the headpiece.
For a Spanish style costume I made a mantilla and then added a fabric rose to it.
Spanish style mantilla with fabric rose

Thursday, November 1, 2012

ruffle, ruffle, ruffle= new tutus and some Spanish skirts

I finally bit the bullet and have made a start on new tutus. One of my big dreams is to build a collection of costumes to offer for rent or sale and have real live people rent or buy them. My dreams are big but my budget and wallet are not. Also, very few people "know" my work.  Seriously, would you shell out upwards of $500 to a complete stranger to make something for you? No, neither would I.
I am hoping though that a few people might be willing to take a chance of renting something, see the quality of my work and then decide to buy.
Efin, what have I started making?
Over the summer I attended Tutu.com's tutu school and besides working really really hard, I learned to make some beautiful items including Spanish skirts. I also went to a mill store with my mother and found some wonderful black and burgundy fabric which just had that Latin feel to it.

A Spanish skirt takes between 40-42 yards of ruffled lace trim which even at the low price of 50 cents a yard gets pricy. You can imagine how  happy I was to find several yards of lovely burgundy lace at a thrift store for next to nothing. All it required was for me to cut it into strips and ruffle it.
Strips of lace to be ruffled for trim

Next I cut out the fabric for the under skirt and the four tiers of ruffles and started ruffling.

Underskirt, lace strips and fabric ruffles
Ruffling lace for trim
After ruffling lace for what seemed like days, I sewed my trim to the fabric layers of the skirt and then went back to ruffling the fabric layers.
First ruffled layer sewn onto underskirt
After each layer was ruffled, it had to be pinned and sewn onto the underskirt. The fabric I used didn't ruffle as tightly as the sparkle organza I had used previously so I spent a lot of time pulling up the gathering threads. Still as each layer was sewn on the skirt began to take on a lovely shape.
layer 2 sewn on, half way there
Layer 3, one more layer to go!
Once I reached the top layer, there was a lot of lace and fabric but the skirts really looked good. After the top layer was sewn on, the basque was attached, then hooks and eyes and voila, a super ruffly Spanish skirt.
The other projects I worked on was a tutu for a competition. I decide to use a stretch satin to make the bodice and basque since i had found 12 yards of it a local thrift store again for next to nothing. The fabric was great to work with (surprisingly easy) but once made I was not happy with how it looked.
The Snow Queen (by Hans Christen Anderson ) costume


The sheen on the satin made the whole ensemble a little too Halloween costume like. Good news was that the costume was for a Halloween contest but it wasn't what I had originally envisioned. I may some day remake this in a silk chiffon.
Kokoshnick style headpiece
Together with dh, I did make a stunning headpiece. It was done as a Russian kokshnik, with silver mesh, diamante jewels, crystals and some lovely trims. The front diamond was made of a vintage diamante triangle (possibly it was a brooch or a belt buckle).
white practice tutu
The final thing I worked on were three practice tutus, two black and one white. Thanks to all I had learned at tutu school (and the fact that I had surpassed the 90th tutu mark) these went together much, much easier than in the past and the result was even better.
My next project will be to finally take the online craftsy class, the couture dress, I started on this summer and give tutus a rest for a few weeks.

Saturday, October 6, 2012

It is not a dream: How to clean (ballet) costumes

 There was a time when people were afraid to wash: themselves, their homes, their clothing. As a result people well, ...stank. At some point in time we discovered that by washing our bodies, our clothing and our homes we not only smelt better, we prevented disease and clothing lasted longer.
In the ballet world there was (and sad to say still is) a superstition or false belief among some that washing is bad for costumes.
Incorrect cleaning could potentially damage a costume but not cleaning, well it is simply disgusting as dancers sweat, a lot. If an item of clothing is simply hung back into storage after wearing, it can accumulate mold and bacterial growth, besides the worst b.o. imaginable.
Can and should you clean costumes?
The simple answer is yes; the more complicated answer follows.
Besides general hygiene, cleaning a costume before it is returned to storage greatly increases the life expectancy of the costumes. Sweat, oils from the skin and other bodily secretions rot fabrics, especially natural fabrics (silk, rayon, cotton). Synthetics such as polyester, nylon and acetate will also deteriorate over time when not cleaned. This is more due to the bacteria and molds that grow and feed on the sweat and skin cells than the bodily fluids themselves.
A ballet tutu is largely made up of nylon net and the pants are either nylon/spandex or cotton bobbin-net. The basque (part at the waist) can be made from silk, cotton, cotton/rayon or nylon; again all washable. Bodices can be made of a wide range of fabrics, most of which can be washed but here it can get tricky. If the fabrics were not washed before being made into the bodice they could potentially run or shrink. Often spot cleaning or dry-cleaning can be used.
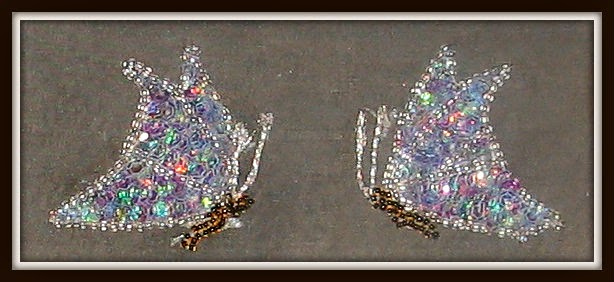
To clean a ballet costume first find out what it is made of. Next if possible remove any decorations. Often decorations are applied to a plate or overlay that is tacked to the tutu and the bodice.  Only Swarovski hot-fix crystals have a patented glue that is dry-cleanable.
For the tutu, soaping and then thoroughly rinsing the crotches with warm water is usually sufficient. A mild soap such as Orvus (OrvusWA paste, purchased at the tractor supply store) or hand soap such as Ivory works well. If needed (for blood, urine or other stains) you can make a paste or soak the crotch in a product such as Biz or Oxyclean. Rarely do you need to wash the whole tutu. If you do, soak in the bath tub or a small kiddy pool. Use a minimum of soap because the tutu net works as a huge bath scrubby and produces a lot of bubbles.
Always air dry costumes and if possible expose the items to sunlight for several hours. Just sunlight will kill both bacteria and mold if given enough time. The only down side of this is that (high doses of) U.V. light will over time break down synthetic fibers such as nylon, acetate and polyester.
For spot cleaning again Orvus or Quick and Brite work well. Quick and Brite is very good for wiping lipstick and other make-up stains off of tights and leotards.
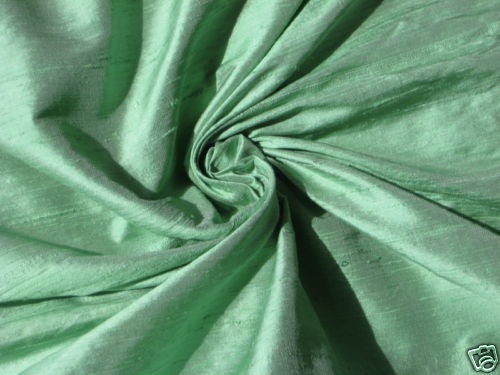
For silk, adding a table spoon or two of distilled, white vinegar to the rinse water also helps to clean them.
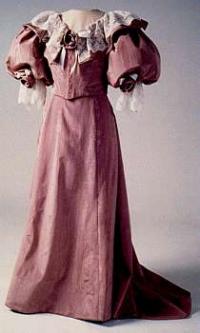
Blue silk and lace peignoir from the 1930's, with original vintage buttons
I recently was given a large number of vintage items. All had been stored in a box in a basement and they smelled of mildew. I carefully hand washed every single item using Orvus soap, luke-warm or cold water and air + sun drying. Not only are they clean and no longer smell, their colors are brighter, the fabric is crisper and they will last for many more years.

A 1970's pants suit made of Indonesian Batik
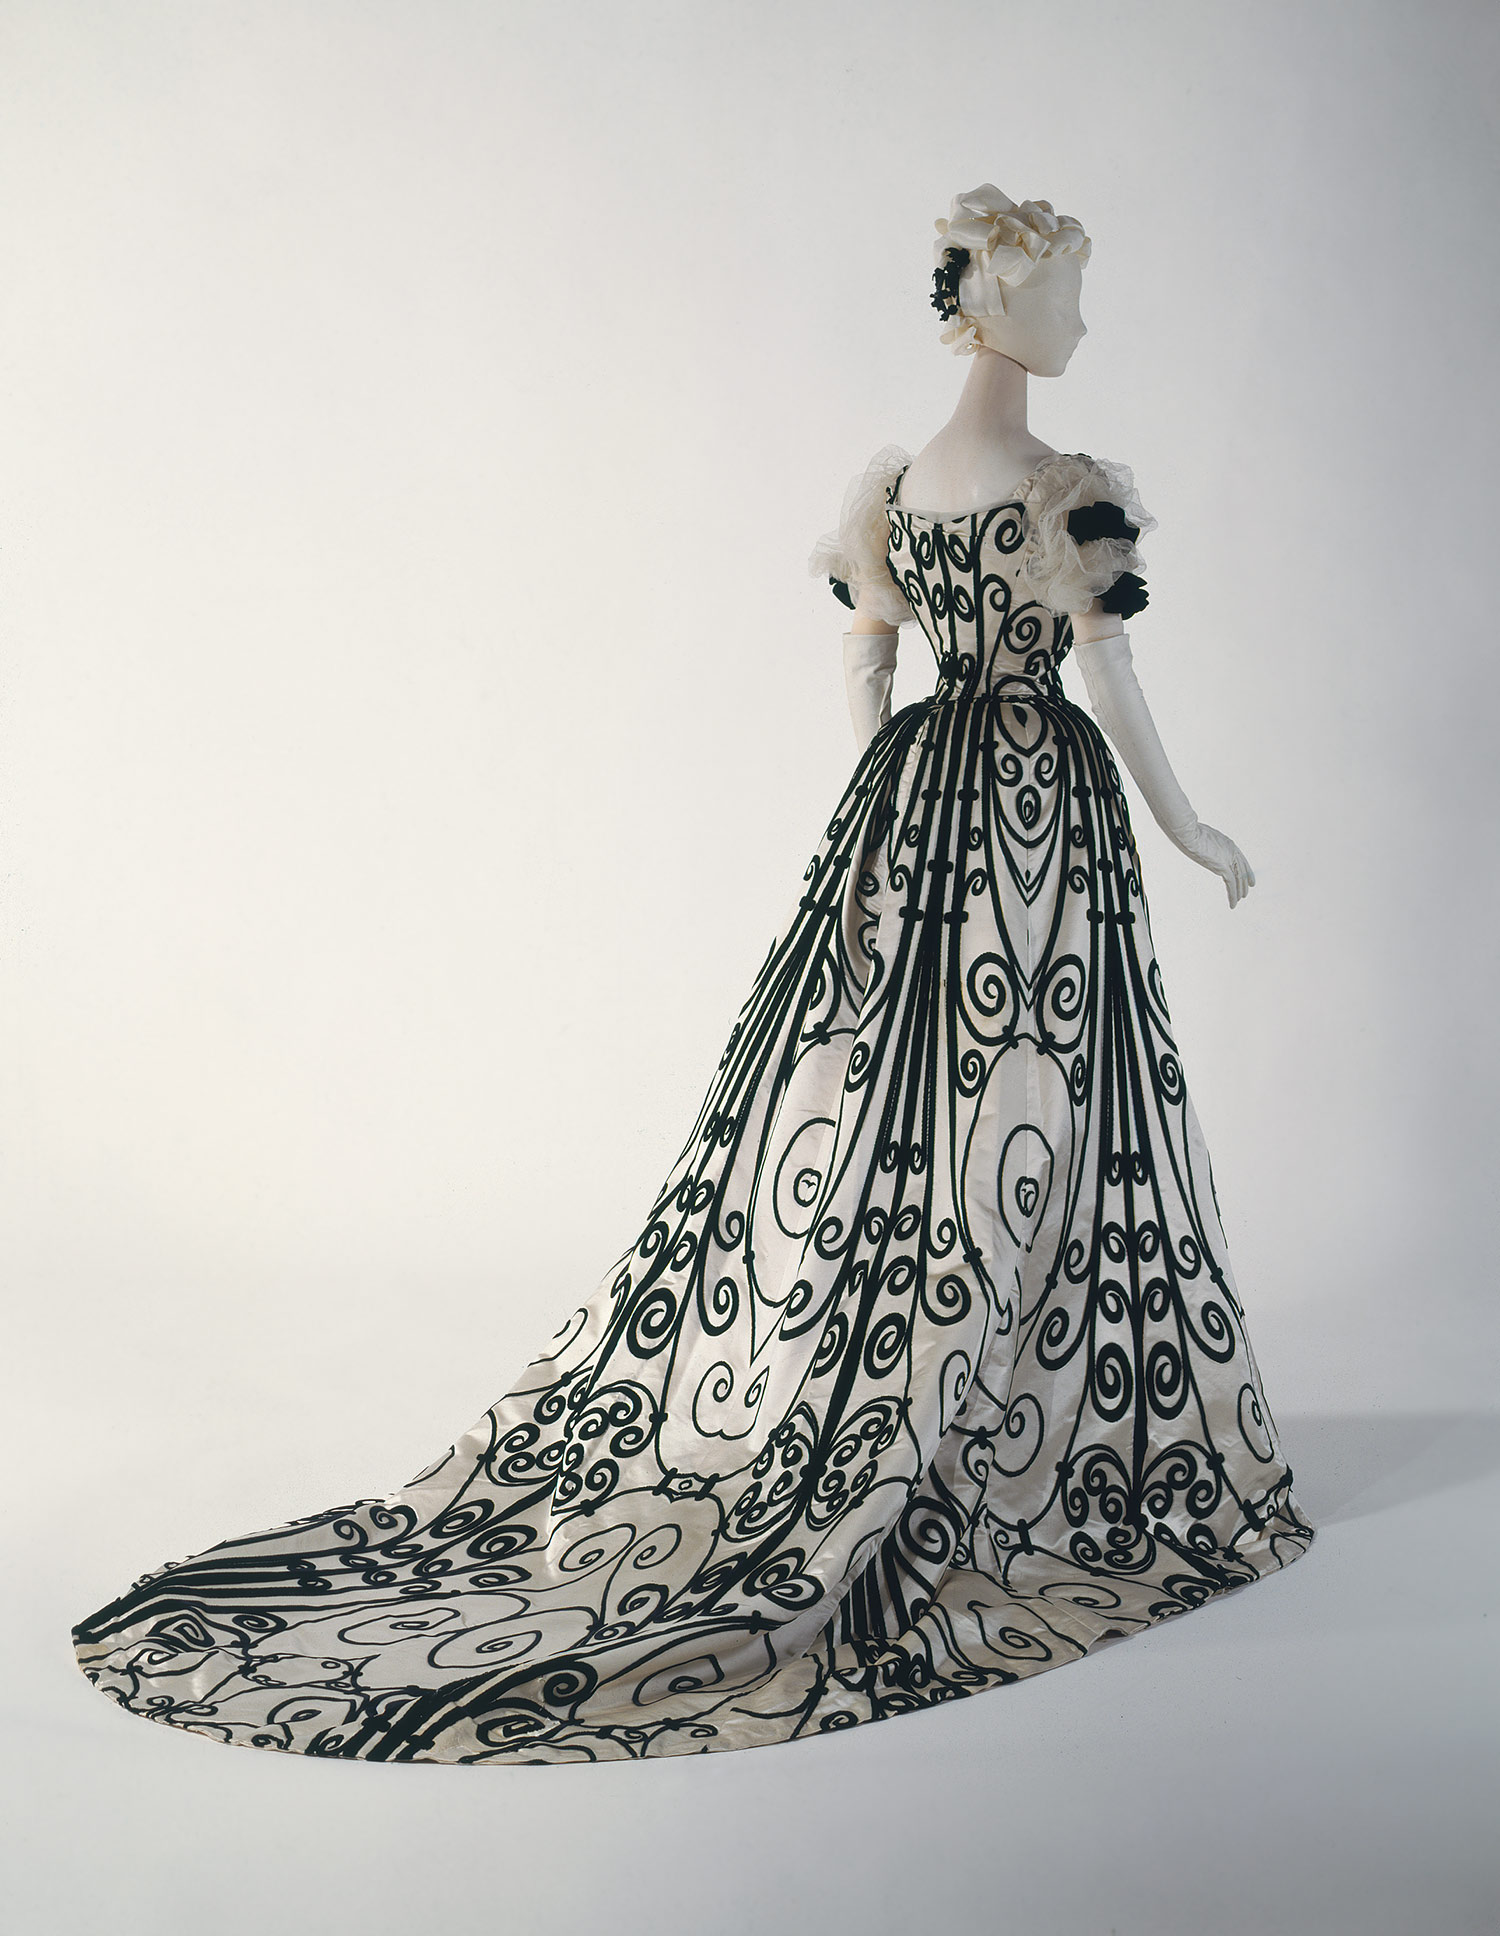
Edwardian (1900's) black silk tulle with tambour style lace embroidery.
Cleaning ones costumes and Vintage items is simply protecting an investment of time and money.


Friday, October 5, 2012

What else is new?

I haven't posted for a while but I have been sewing a few things. I have been fortunate to have had a lot of (local) business lately both alterations and custom work.
African batik fabric, cut to be sewn into skirt
The custom work has been fun because I got to work with some gorgeous African Batiks. I made two skirts. One (which I did not photograph, sorry) required a careful matching of the intricate pattern. It turned out very well and was definetly not an "off the rack" item. The other skirt needed the "right" pattern to display the beautiful colors and unique patterns of the fabric. Together the cutomer and I choose a tiered skirt with a yoke waist and ruffled lower edge.  The skirt was more than a full circle which allowed us to show off the fabric's beauty but did not make a skirt that was so large to overwhelm the petite wearer.
Finished skirt
Today, I was able to hand over the skirt to the customer and not only did it fit perfectly, it looked stunning, so I was very happy with the result.
My next major project will be to start building tutus for my (rental) business. I have three dancer's who have volunteered to be models. Yesterday and today I drew new basque patterns using the techniques I learned at tutu school and I made some adjustments to the panty patterns I had made to get a better fit. I'll keep you posted about this process as I go along.

It's beginning to look a lot like....

I have been promising my dear husband (dh) a new pair of pants for, months. Either I have been too busy, too tired or just too unmotivated to get on with it.
Let me say, making a pair of well fitting, men's pants is hard! No wonder tailors used to have apprentices work for them for years. At a tailor's there are many specialized jobs: a cutter, a draper, a shirt maker even a button hole maker.
In this project I reverse engineered a pattern from my husband favorite pants, then set about making new pants from a quality linen.
One of the things that is difficult (and different on dress pants) to draft is the pockets. Jeans have patch pockets in the back and an appliqued pocket on the front. Both types of pockets were discussed in the online class that I took.
I started by thread basting all the seam lines and the lengthwise and cross wise grains. After that everything was transferred to a piece of organza; then I made a paper pattern and then I cut out a muslin.

Original pants thread basted
I fitted these on dh and found that I needed to give him some more sitting room, and straighten the side seam. After making these changes to the pattern I  ran into a major hurdle: the pockets.
Dress pants have inset pockets, front pleats and back pockets with welts. It is very difficult to draft a good pocket pattern from the actual pants. Also, these were Australian pants, and they have some interesting (and highly desirable) features, including a change pocket hidden under the waist band.
After trying several things, becoming terribly frustrated because they just were not right, I broke down and bought a men's Vogue pattern. It had the inset pockets, the welt pockets and most importantly the instructions! Reading those was such an "aha, erlebness". Nothing is hard once you can "see" the solution. After that I sewed those pants up in no time flat (less than hour).
the pants! are ready to try on

Voila! here they are. I tried them onto dh and  by golly they fit perfectly. Alas, once I put the waistband on they seemed a bit snug, so I had to let them out a bit. After finishing them, I pressed and hemmed them, hung them up and forgot about them. The next day, dh asked me: Well what do you think of my pants? I gave him a strange look because I did not realize these were the new ones?!
That means I must have done a good job right?

Tuesday, September 18, 2012

Illustrations: bringing ideas to life

I have not posted for a while simple due to life. The school year started again, I had several projects to work on for customers (Hurrah!) and I am still slogging away at dH linen pants.
One of my customers brought back some fabulous Batiks from Africa and it has been a lot of fun working with her to create some outfits.
I will post some updates photos of that soon. I also signed up for two online Craftsy classes: Shoot-it: on how to take better photo's, much needed here and The couture dress.Although I have not been able to do much with either class, I have had fun looking for and then buying the fabric for the dress, a lovely soft green Duponi silk:
Another positive step forward though is that I have started to take some drawing classes so that I can put some of my ideas for costumes on paper. Today we learned more about different types of lines. It may look very simple to try to draw a line on paper, but it isn't. After practicing straight, curved and wavy lines, we worked on creating Laura Birch inspired drawings of cat's
This is not my drawing but my sketch looks a lot like this.
My next plan is to start working on some costume designs for tutus I would like to build to offer as rental. My ultimate goal is to someday be able to make sketches and illustrations like this Leon Baskt illustration:

Thursday, August 2, 2012

Sending mom to the prom in style: mp dress part 3

 After my last post about the mom prom dress, I worked hard to get it ready. I sewed all the pieces together, added the sleeves, the hooks and eyes in the front and some hanger loops so that the bodice could be hung up easily.
front of bodice
back of bodice
I finished the skirt adding a stay tape to hold the pleats to the back of the skirt and also added hanger loops.
bodice and skirt front

back of bodice and skirt
The little hat also needed finishing. I had covered the buckram frame with a layer of cotton flannel so that any fashion fabric added could be pulled smooth.
Crown tip and brim covered with flannel "mull"
Initially I had wanted to make swirls on the top and side but after trying several things I ditched that as it was too much on such a small hat. In the end I opted for covering the tip with purple taffeta, black satin and using some patterned black satin bias binding to finish the edges.
Flannel covered crown tip and sating covered brim
After sewing the crown to the brim, I added a band of ruffled black lace (the same lace I used on the front of the bodice), a lace bow and decoration of feathers on the side of the hat.
Finally, I attached a band of horsehair so that Heather could pin the hat on and a ribbon to tie as well.
Mini top hat

Two days ago I was able to do the final fitting for Heather's dress. When everyone saw her in the dress there was a hushed, WOW from everyone. She really looked wonderful and elegant.

The bodice needed one or two final little tweeks and we agreed that it needed a touch of sparkle. The front hook and eye closures did not gape but the edge was noticeable. I think that if I were to make something like this again I would do it differently because such front closures are not as attractive as back closures. I added a strip of black lace along the neck line  and then hand beaded it with some beads and sequins.

I took several photos of Heather in the dress with her camera and with mine. When I returned home I found that my camera was broken ?! and the pictures I took with Heather's camera were not very good. I think it is time I take that photography class!!!

Just so that you have a vague idea what the dress looked like I am posting three photos and will replace these ASAP.
Back of dress
side view


Heather in her mom-prom dress with mini top hat


Sunday, July 22, 2012

M.P. dress takes shape (part 2)

Since my last post, the mom prom (MP) has started to take shape. After our first fitting Heather and I ditched the draped bodice opting instead for a simpler bodice.
I then began to cut out the skirt and bodice. The two iconic Worth dresses that formed some of the inspiration for what I was going to make reminded me of something very important: making sure the pattern matched.
Worth flocked taffeta dress
Worth evening gown
Worth was a master of creating beautiful lines, that were pleasing to look at and flattered the wearer. He also had the advantage that the fabrics for his dresses were specifically made with the dress design in mind.
The flocked taffeta I was working with not only had a pattern, the pattern had a repeat. It was very important to make sure that the pieces matched or it would be ugly.
I started working on the skirt because it was "easier". It took some time but I was able to cut and then sew the skirt so that the pattern matched very well. The skirt could have had a train but it was left off so that is would be easy to dance in. The skirt was cut as a walking length skirt with the bottom edge faced in a black satin.

Back of the skirt with pleats
Next step was to work on the bodice. I started by cutting out the lining, applying bone casings and then flat-lining the fashion fabric to the back piece. Every time I cut a piece I would line it up and sew it before cutting the next to be sure that it all matched. The result was worth the effort.

back of the bodice with fabric carefully matched
Bodice front (inside part facing), quilted for strength.
I then cut and worked on quilting the two front pieces as I had learned in the couture bodice class I took at Tutu.com's school. Normally this is done on the back pieces of a (high end) ballet bodice where the hooks and bars go because these pieces have a lot of stress on them. This bodice does up the front instead of the back, so I felt it was important to  treat these pieces this was.  Tomorrow I will continue to work on the front of the bodice and hopefully finish it. I made the sleeves out of a plain black satin and laid out how I want to cut the front of the bodice. Again I am going to apply a technique I learned during Travis Halsey's class, called decorative fold backs (these techniques are detailed on a new DVD by Mr Halsey, available through Tutu.com)
One other thing I worked on was the little top hat. I began by making a wire and buckram hat shape.
wired buckram shape for hat

I then covered the crown and brim with black cotton flannel to create a smooth shape. I used some Fabritac glue to attach the flannel to the hat shape. Once it has dried I will cover the hat shape with black satin and add decorations in peacock feather colors (purple, dark green) and sew the brim and crown together.
More in my next post.


Friday, July 20, 2012

The "mom prom" dress

It is finally time to start on my friend Heather's "mom prom dress". Heather is our local MOPS (Mother's of Preschoolers) representative and she is going to their conference soon. New this year at the conference is the so-called "mom prom" with featured artist Plumb.

Since Heather helped me set up my blogs and has generally been a wonderful friend I want to make sure she goes in appropriate style.Together we came up with  a Worth inspired bodice and dress with a few "steam-punk" twits, including a miniature top hat and time permitting lace gloves.

I found a gorgeous black flocked taffeta,
black flocked taffeta
dug through my stash of fabrics for velvets, taffetas
deep plum taffeta
and laces to combine for the bodice.  I am going to use two patterns from Laughing moon Mercantile with some modifications: their five gored skirt and matching bodice pattern.


Today I did a first fitting and will begin constructing the skirt and bodice soon. We decided to make the sleeves out of a plain black satin, rather than the flocked taffeta and I am going to use some of the techniques I learned at  Tutu.om's tutu school to modify the front of the bodice. It will have some of the plum colored taffeta, some black velvet piping and a dark green flocked taffeta to create longer lines. The skirt will be made of the black flocked taffeta with a satin facing at the hem.
To finish off the ensemble, Heather will have a little top hat with peacock feathers and peacock colored accents (these colors and fabrics are mirrored in the bodice).
I need to get on to that now and will post photographs soon.