For several years now I have been interested in different embroidery techniques and once I started working on costuming, I became very interested in bead embroidery.
At one point I discovered the book, Bead & Sequin embroidery stitches, by Stanley Levy. The book has clear tutorials on various stitches and suggests that you make a sampler. Being who I am I thought this was not much fun so instead I created a Russian style kokosnik for my then 8 year old daughter, but practiced all the different stitches.

Beading this way is fairly slow because you have to pick up individual beads and sequins but you can make some beautiful and intricate designs.
While researching bead embroidery on the internet I came across some references to tambour beading and also to the Indian technique of bead embroidery with an ari needle. Tambour embroidery gets it name from the French word for drum (tambour) because the fabric is stretched tightly across a frame. The stitches, which resemble a chain stitch, are made with a modified crochet hook. Two types of lace, Ayershire and Coggeshall lace are also made using tambour needle.
Tambour embroidery is a very fast technique of applying beads and sequins. The technique is "old" dating back to the middle 1700's but it is still used today in the French haute couture.
As a technique, tambour embroidery is a dying art. The only official school where the technique is still taught is L'ecole Lesage in Paris and few attend or graduate from this school. Thankfully a professor of theater costumes at the University of Kentucky also became interested in this technique, found someone to teach him the basics and eventually attended and graduated from Lesage in 2007. Robert Haven founded The Bead, Embroidery and Design studio, in Lexington Kentucky and for the last several years has been teaching classes in his home, in San Francisco, Toronto and at LACIS in Berkely.
I discovered Robert's website several years ago and was determined to enroll and learn tambour embroidery. It took me 2 years of planning but finally in March of 2014, I was able to go to Lexington and take the 4 day beginner class.
Not only is Robert a wonderful teacher, he is also a gracious host. Every day, class started with good coffee and freshly baked goods. His studio is built in his converted garage and has a screen door so that on fine days, you can bead while enjoying the "outdoors".
On the first day of class we learned how to frame up the fabric, put out hooks into the handles, transfer the design to the fabric, make chain stitches, shade with embroidery floss and then apply seed beads and bugle beads. Something which people do not understand or know about tambour beading is that the beads and sequins are applied from underneath the frame. In the Indian bead embroidery technique the beads and sequins are picked up on the needle but not with tambour work. All the beads and sequins are strung onto thread and then attached to the fabric using a chain stitch. The French technique allows one to use much smaller beads because the needles do not go through the beads.
By day two we were on to outlining our designs in seed beads and bugle beads and on the third day we were up to applying sequins. At the end of class on the fourth day, we all had learned so much. I was the oldest and slowest in our class and so did not finish my project but sometimes age and determination can over come a lot. Robert had told us that we needed to practice daily to become proficient and I was determined to get better.
Once back at home, I continued to work at my project
 |
| "work-side" of the class project |
 |
| finished side |
 | |||||
| completed class project. |
At first I had though of simply repeating the class project at home going through all the steps but I wanted to challenge myself and so instead decided to draw some small designs: 2 matching butterflies, two dragon flies and then a small freeze of grape vines for a headpiece.
 |
| small dragon flies in seed beads |
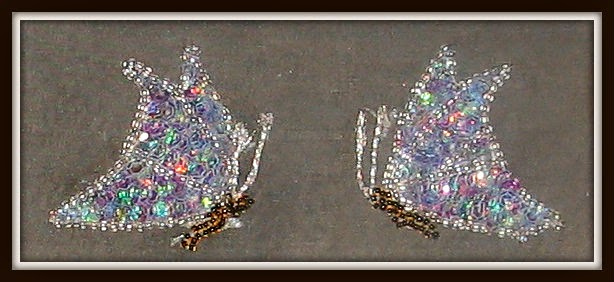
Next I started on two butterflies.

These little designs would make pretty hairpins or appliques.
I was then going to start on the design for a headpiece but I received two orders for headpieces for the ballet Sleeping Beauty. One was for a Blue Bird, the second was at first for six and then nine headpieces for Sleeping beauty. I was very excited about this but at first I was worried that I would not have time to practice my beading for several weeks, until I came up with the brilliant idea to "practice" on the headpieces. Beads and especially sequins are very light weight but they give a huge amount of sparkle-price-weight performance.
I began by using the already framed fabric to start the first three headpieces: Charm, Generosity and Song Bird and later went on to frame up a new piece of fabric for the remaining six headpieces.
 |
| tambour embroidery frame with the beginnings of Sleeping Beauty headpieces |
We had some beautiful weather and although I do not have a screened porch or garage, I decided to take my frame outside to work there. The headpieces are done and on their way to their new home. Once they have made their performance debut I will write another post documenting their creation. The "old" technique of tambour embroidery has become a new way for me to create beautiful things. I have truly falling in love with this method and hope to continue to become more proficient at it. I'll keep you posted.
 | |
| working on Sleeping Beauty headpieces in my garden. |