I have not posted for a while simple due to life. The school year started again, I had several projects to work on for customers (Hurrah!) and I am still slogging away at dH linen pants.
One of my customers brought back some fabulous Batiks from Africa and it has been a lot of fun working with her to create some outfits.
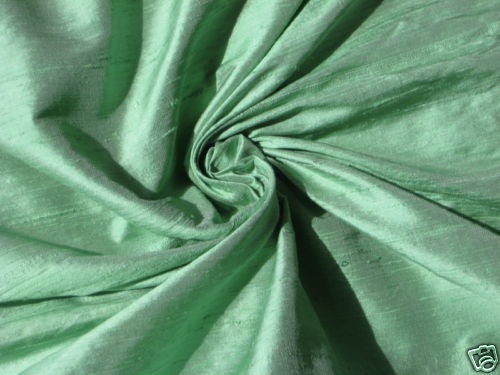
I will post some updates photos of that soon. I also signed up for two online Craftsy classes: Shoot-it: on how to take better photo's, much needed here and The couture dress.Although I have not been able to do much with either class, I have had fun looking for and then buying the fabric for the dress, a lovely soft green Duponi silk:
Another positive step forward though is that I have started to take some drawing classes so that I can put some of my ideas for costumes on paper. Today we learned more about different types of lines. It may look very simple to try to draw a line on paper, but it isn't. After practicing straight, curved and wavy lines, we worked on creating Laura Birch inspired drawings of cat's
This is not my drawing but my sketch looks a lot like this.
My next plan is to start working on some costume designs for tutus I would like to build to offer as rental. My ultimate goal is to someday be able to make sketches and illustrations like this Leon Baskt illustration:
Tuesday, September 18, 2012
Thursday, August 2, 2012
Sending mom to the prom in style: mp dress part 3
front of bodice |
back of bodice |
bodice and skirt front |
back of bodice and skirt |
Crown tip and brim covered with flannel "mull" |
Flannel covered crown tip and sating covered brim |
Finally, I attached a band of horsehair so that Heather could pin the hat on and a ribbon to tie as well.
Mini top hat |
Two days ago I was able to do the final fitting for Heather's dress. When everyone saw her in the dress there was a hushed, WOW from everyone. She really looked wonderful and elegant.
The bodice needed one or two final little tweeks and we agreed that it needed a touch of sparkle. The front hook and eye closures did not gape but the edge was noticeable. I think that if I were to make something like this again I would do it differently because such front closures are not as attractive as back closures. I added a strip of black lace along the neck line and then hand beaded it with some beads and sequins.
I took several photos of Heather in the dress with her camera and with mine. When I returned home I found that my camera was broken ?! and the pictures I took with Heather's camera were not very good. I think it is time I take that photography class!!!
Just so that you have a vague idea what the dress looked like I am posting three photos and will replace these ASAP.
Back of dress |
side view |
Heather in her mom-prom dress with mini top hat |
Sunday, July 22, 2012
M.P. dress takes shape (part 2)
Since my last post, the mom prom (MP) has started to take shape.
After our first fitting Heather and I ditched the draped bodice opting
instead for a simpler bodice.
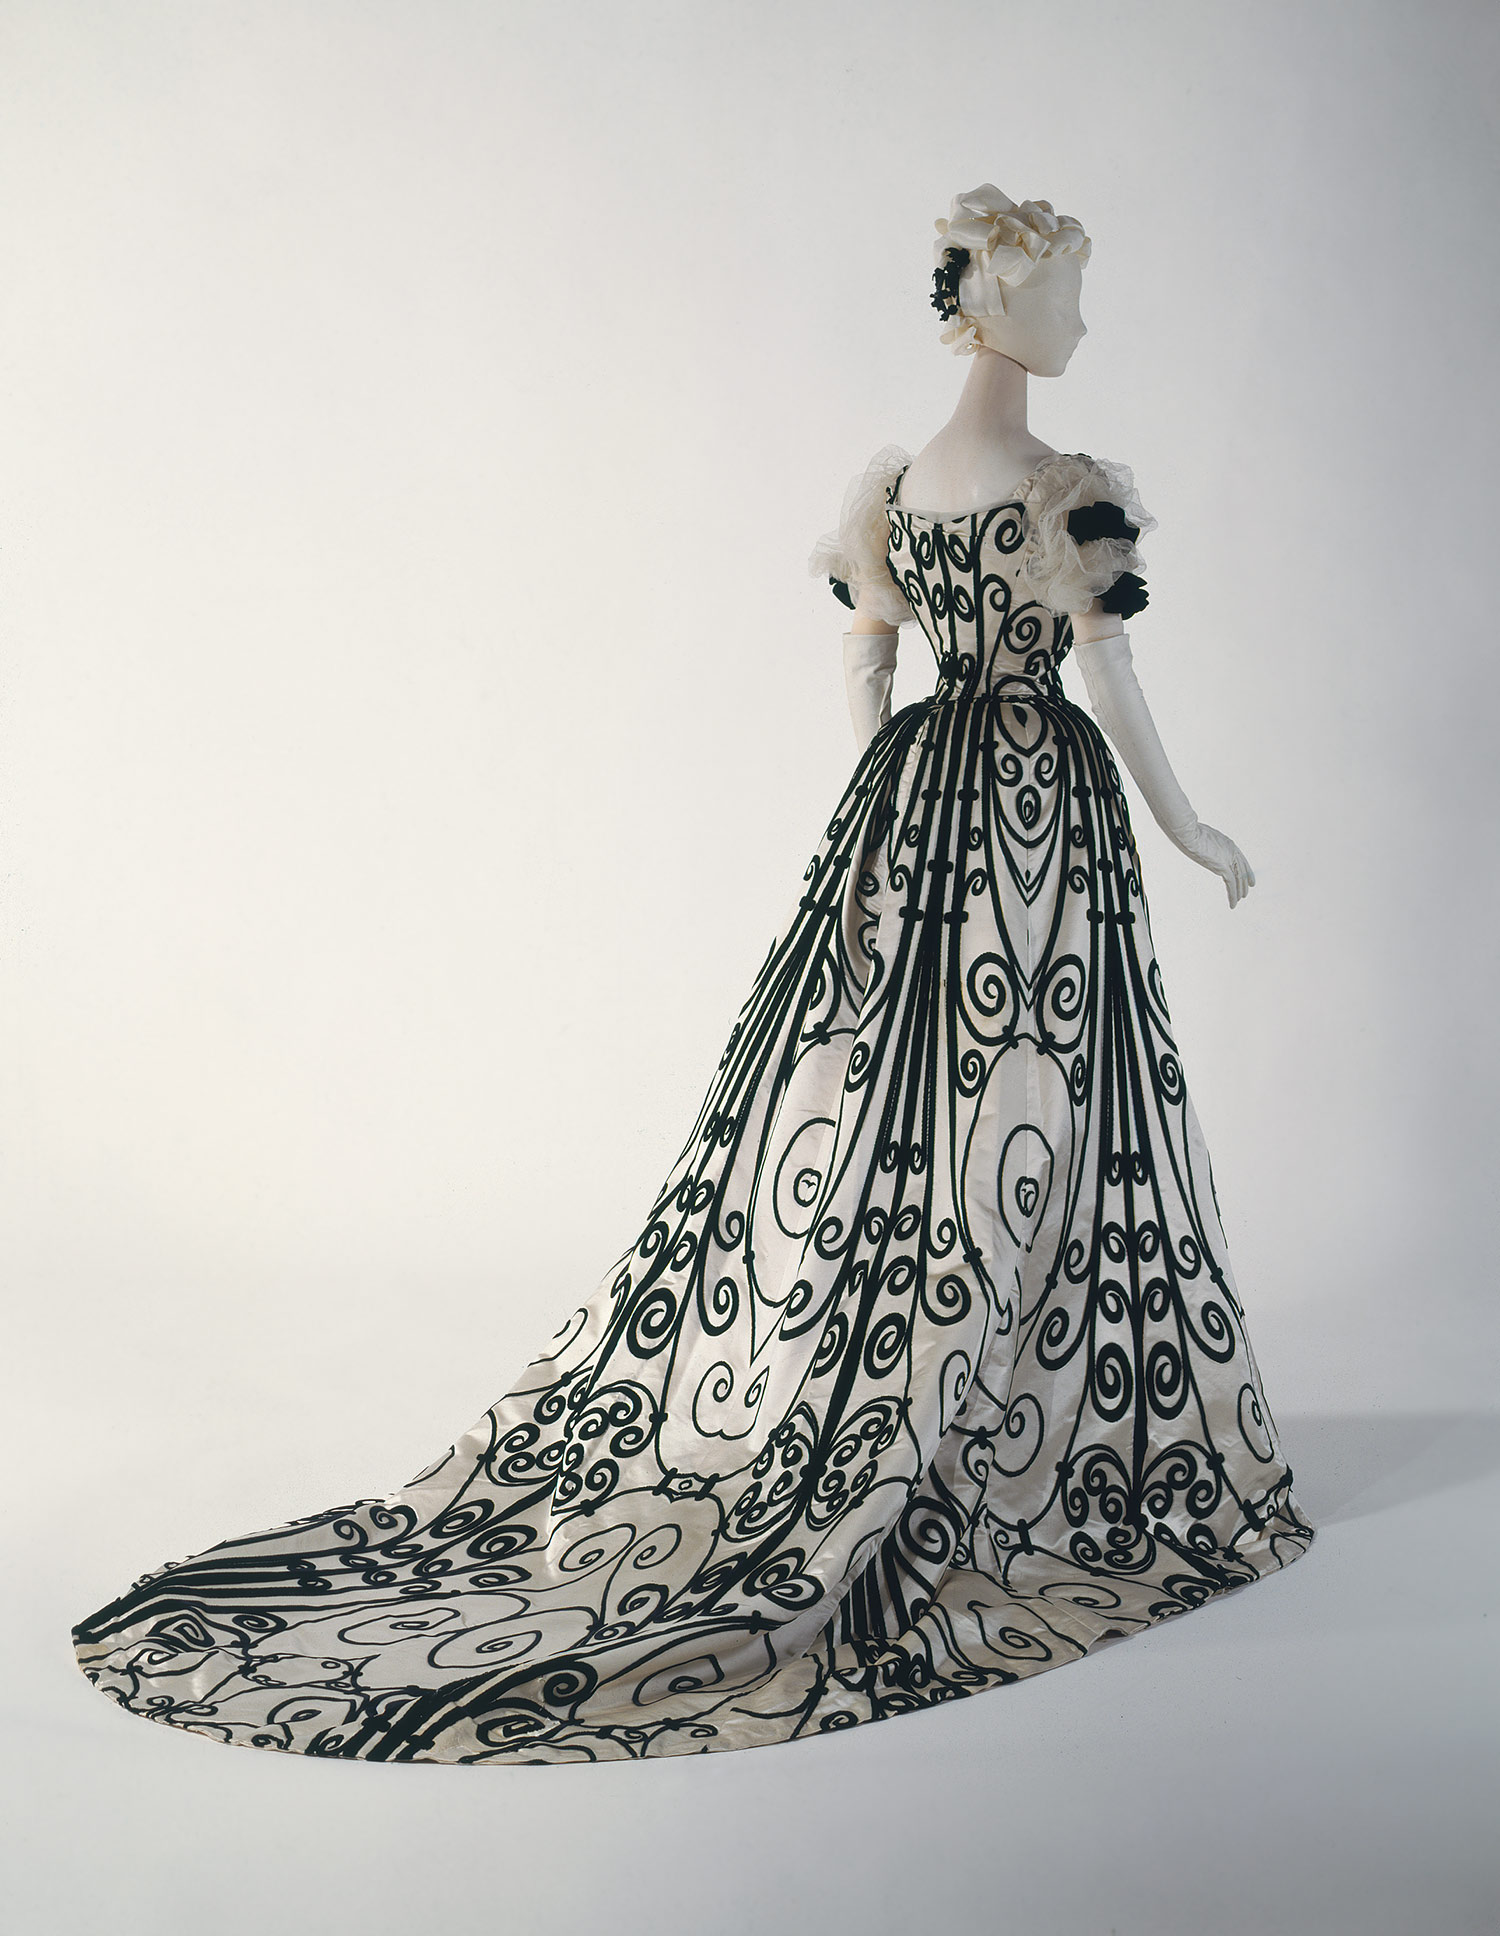
I then began to cut out the skirt and bodice. The two iconic Worth dresses that formed some of the inspiration for what I was going to make reminded me of something very important: making sure the pattern matched.
Worth was a master of creating beautiful
lines, that were pleasing to look at and flattered the wearer. He also
had the advantage that the fabrics for his dresses were specifically
made with the dress design in mind.
The flocked taffeta I was working with not only had a pattern, the pattern had a repeat. It was very important to make sure that the pieces matched or it would be ugly.
I started working on the skirt because it was "easier". It took some time but I was able to cut and then sew the skirt so that the pattern matched very well. The skirt could have had a train but it was left off so that is would be easy to dance in. The skirt was cut as a walking length skirt with the bottom edge faced in a black satin.
Next step was to work on the bodice. I started by cutting out the lining, applying bone casings and then flat-lining the fashion fabric to the back piece. Every time I cut a piece I would line it up and sew it before cutting the next to be sure that it all matched. The result was worth the effort.
I then cut and worked on quilting the two front pieces as I had learned in the couture bodice class I took at Tutu.com's school. Normally this is done on the back pieces of a (high end) ballet bodice where the hooks and bars go because these pieces have a lot of stress on them. This bodice does up the front instead of the back, so I felt it was important to treat these pieces this was. Tomorrow I will continue to work on the front of the bodice and hopefully finish it. I made the sleeves out of a plain black satin and laid out how I want to cut the front of the bodice. Again I am going to apply a technique I learned during Travis Halsey's class, called decorative fold backs (these techniques are detailed on a new DVD by Mr Halsey, available through Tutu.com)
One other thing I worked on was the little top hat. I began by making a wire and buckram hat shape.
I then covered the crown and brim with black cotton flannel to create a smooth shape. I used some Fabritac glue to attach the flannel to the hat shape. Once it has dried I will cover the hat shape with black satin and add decorations in peacock feather colors (purple, dark green) and sew the brim and crown together.
More in my next post.
I then began to cut out the skirt and bodice. The two iconic Worth dresses that formed some of the inspiration for what I was going to make reminded me of something very important: making sure the pattern matched.
Worth flocked taffeta dress |
Worth evening gown |
The flocked taffeta I was working with not only had a pattern, the pattern had a repeat. It was very important to make sure that the pieces matched or it would be ugly.
I started working on the skirt because it was "easier". It took some time but I was able to cut and then sew the skirt so that the pattern matched very well. The skirt could have had a train but it was left off so that is would be easy to dance in. The skirt was cut as a walking length skirt with the bottom edge faced in a black satin.
Back of the skirt with pleats |
back of the bodice with fabric carefully matched |
Bodice front (inside part facing), quilted for strength. |
One other thing I worked on was the little top hat. I began by making a wire and buckram hat shape.
wired buckram shape for hat |
More in my next post.
Friday, July 20, 2012
The "mom prom" dress
It is finally time to start on my friend Heather's "mom prom dress". Heather is our local MOPS (Mother's of Preschoolers) representative and she is going to their conference soon. New this year at the conference is the so-called "mom prom" with featured artist Plumb.
Since Heather helped me set up my blogs and has generally been a wonderful friend I want to make sure she goes in appropriate style.Together we came up with a Worth inspired bodice and dress with a few "steam-punk" twits, including a miniature top hat and time permitting lace gloves.
I found a gorgeous black flocked taffeta,
dug through my stash of fabrics for velvets, taffetas
and laces to combine for the bodice. I am going to use two patterns from Laughing moon Mercantile with some modifications: their five gored skirt and matching bodice pattern.
Today I did a first fitting and will begin constructing the skirt and bodice soon. We decided to make the sleeves out of a plain black satin, rather than the flocked taffeta and I am going to use some of the techniques I learned at Tutu.om's tutu school to modify the front of the bodice. It will have some of the plum colored taffeta, some black velvet piping and a dark green flocked taffeta to create longer lines. The skirt will be made of the black flocked taffeta with a satin facing at the hem.
To finish off the ensemble, Heather will have a little top hat with peacock feathers and peacock colored accents (these colors and fabrics are mirrored in the bodice).
I need to get on to that now and will post photographs soon.
Since Heather helped me set up my blogs and has generally been a wonderful friend I want to make sure she goes in appropriate style.Together we came up with a Worth inspired bodice and dress with a few "steam-punk" twits, including a miniature top hat and time permitting lace gloves.
I found a gorgeous black flocked taffeta,
black flocked taffeta |
deep plum taffeta |
Today I did a first fitting and will begin constructing the skirt and bodice soon. We decided to make the sleeves out of a plain black satin, rather than the flocked taffeta and I am going to use some of the techniques I learned at Tutu.om's tutu school to modify the front of the bodice. It will have some of the plum colored taffeta, some black velvet piping and a dark green flocked taffeta to create longer lines. The skirt will be made of the black flocked taffeta with a satin facing at the hem.
To finish off the ensemble, Heather will have a little top hat with peacock feathers and peacock colored accents (these colors and fabrics are mirrored in the bodice).
I need to get on to that now and will post photographs soon.
Sunday, July 15, 2012
Tutu school = too terrific!
This year, thanks to my wonderful parents who gave me the classes and my family who took me there, I attended Tutu.com tutu school in Charlotte North Carolina.
It was an interesting educational experience, which despite being 5 days of grueling hard work was fun?! I am still trying to process the years of experience that is crammed into you in a very short time.
A good friend of my husband's, who had studied at both MIT and Stanford, was once asked "how much fun was that"? He answered, "well, if you think taking a sip from a fire hose is "fun" than yes it was". Tutu school is like taking a sip from a fire hose.
The first thing that needed to be done was pack up my sewing machines and other sewing paraphinelia into something that would fit into the back of our car. We managed to pack everything and set off before 8 a.m. for the long drive down to Charlotte.
The journey went very well and we arrived at 8p.m. at out hotel.
The next morning at 8 a.m., tutu school started in the hotel's conference room. My project was to make a Spanish skirt, while the other women were making mostly classical tutus, a few Romantic tutus, one ribbon candy tutu and two contemporary tutus.
I had previously taught myself how to make basques using the method described in Claudia Folts' book The Classical tutu, so I was told to sit in with the groups taught by Travis Halsey. He uses a mathematical method to draft a basque and the resulting basque has hip seams as well as a back seam.
After cutting everything out, sewing and serging the skirt and ruffles, I needed to sew many yards of lace to the ruffle edges and then ruffle the layers. Next, the ruffled layers were sewn to the skirt.
Finally, the basque was attached to the top of the skirt and hook and closure were sewn to the edges.
The skirt turned out well for a first attempt and was finished in the two days set for it, working from 8-6 each day.
On the Tuesday I made a tutu bag for carrying tutus. I had wanted to spend some time studying the tutus that were in the room and photographing one or two but ended up not having time.
The last two days of tutu school were spent learning couture bodice techniques from Travis Halsey. I had brought some lace and trim from home, some lovely fabric was in my kit and the school provided huge bags of fabric pieces to work with. One of the hardest part I felt was deciding what would look good together as there was so much to choose from. I found a small piece of gold duponi, some gold flowered brocade, a black mesh with red sparkly flowers and a black and red ribboned fabric.
My assembly of the parts of my pattern was much simpler than some of the other students because I felt the bodice design did not need to be over embellished. The variety of couture techniques that I learned made the bodice easier to assemble while at the same time resulting in a superior result.
In the two days of the class, I finished the front and back, inserted the nude inset and piped the top edges. Since returning home I have piped the remaining edges and made an applique for the front. I also fit the bodice on E13 and will complete the bodice this week.
I would still like to add embellishments to the applique, make a matching headpiece and possibly add sleeves. I will post photographs once the project is completed.
We drove home, making the trip in one day which was good since we were all very tired.
I believe I would attend tutu school or some other intensive sewing course again if I had the opportunity since the wealth of knowledge that can be aquired in a very short time is vast. The whole experience was intense and challenging and probably not something everyone would enjoy or could deal with. Going into the classes with the right attitude and expectations greatly helps.
To find out more about the training offered go to Tutu.com's seminars
Here are the Spanish skirt and bodice that I made at Tutu school:
It was an interesting educational experience, which despite being 5 days of grueling hard work was fun?! I am still trying to process the years of experience that is crammed into you in a very short time.
A good friend of my husband's, who had studied at both MIT and Stanford, was once asked "how much fun was that"? He answered, "well, if you think taking a sip from a fire hose is "fun" than yes it was". Tutu school is like taking a sip from a fire hose.
packed and ready to go |
Packing for tutu school |
The journey went very well and we arrived at 8p.m. at out hotel.
The next morning at 8 a.m., tutu school started in the hotel's conference room. My project was to make a Spanish skirt, while the other women were making mostly classical tutus, a few Romantic tutus, one ribbon candy tutu and two contemporary tutus.
I had previously taught myself how to make basques using the method described in Claudia Folts' book The Classical tutu, so I was told to sit in with the groups taught by Travis Halsey. He uses a mathematical method to draft a basque and the resulting basque has hip seams as well as a back seam.
After cutting everything out, sewing and serging the skirt and ruffles, I needed to sew many yards of lace to the ruffle edges and then ruffle the layers. Next, the ruffled layers were sewn to the skirt.
Finally, the basque was attached to the top of the skirt and hook and closure were sewn to the edges.
The skirt turned out well for a first attempt and was finished in the two days set for it, working from 8-6 each day.
Sewing the third ruffled layer to the skirt |
The tutu carry bag I made. |
bodice front |
Beginnings of a lace applique for the front of the bodice |
I would still like to add embellishments to the applique, make a matching headpiece and possibly add sleeves. I will post photographs once the project is completed.
We drove home, making the trip in one day which was good since we were all very tired.
I believe I would attend tutu school or some other intensive sewing course again if I had the opportunity since the wealth of knowledge that can be aquired in a very short time is vast. The whole experience was intense and challenging and probably not something everyone would enjoy or could deal with. Going into the classes with the right attitude and expectations greatly helps.
To find out more about the training offered go to Tutu.com's seminars
Here are the Spanish skirt and bodice that I made at Tutu school:
Spanish skirt and couture bodice made at Tutu.com school |
Thursday, June 28, 2012
Cinderella on stage
Here are a few photo's and video clips of how Ithaca Ballet's Cinderella appeared on stage at the dress rehearsal.
Video clips from Cinderella:
Cinderella dress rehearsal |
Cinderella Fairy Godmother attendants |
Cinderella, Fairy Spring, Fairy Summer, Fairy Godmother, Fairy Autumn, Fairy Winter and Fairy attendants |
Cinderella dress rehearsal, Fairy Autumn |
Cinderella, dress rehearsal, Fairy Winter |
Cinderella dress rehearsal Fairy Spring |
Cinderella Fairy Summer |
Tuesday, June 26, 2012
Sleeping beauty on stage
Here are some photos and short video clips from Sleeping beauty on stage:
Sleeping Beauty Act 1 Waltz:
The Rose adagio:
Aurora's friends dance at her 16th birthday party:
Courtier Dance Act 3, Sleeping Beauty
Promenade Act 3:
Precious stones:
Blue Bird and Princess Florine Pas de deux:
video clip
Curtain call:
Sleeping Beauty Act 1 Waltz:
The Rose adagio:
Beth Mochizuki as Aurora, Johann Studier as a suitor (photo by Johann Studier) |
Beth Mochizuki, Sleeping Beauty Act 1 (photo by Johann Studier) |
Beth Mochizuki as Aurora, Johann Studier as one of the four suitors (photo by Johann Studier) |
Blue Bird and Princess Florine Pas de deux:
Curtain call:
Ithaca Ballet Sleeping beauty (photo and all tutus by Hilary Sharp) |
Subscribe to:
Posts (Atom)